Can You Spray Paint 3D Printed Objects? Absolutely!
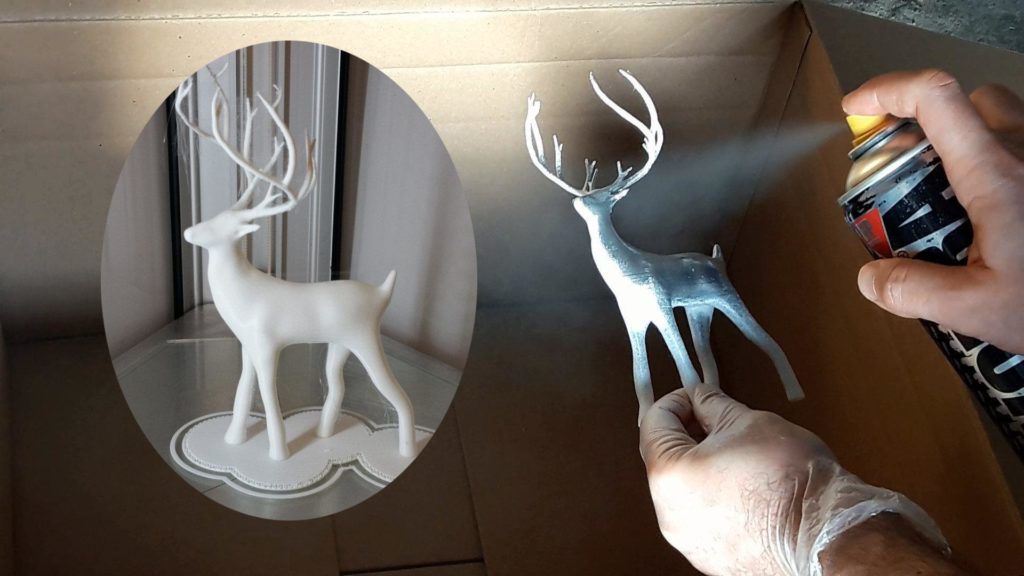
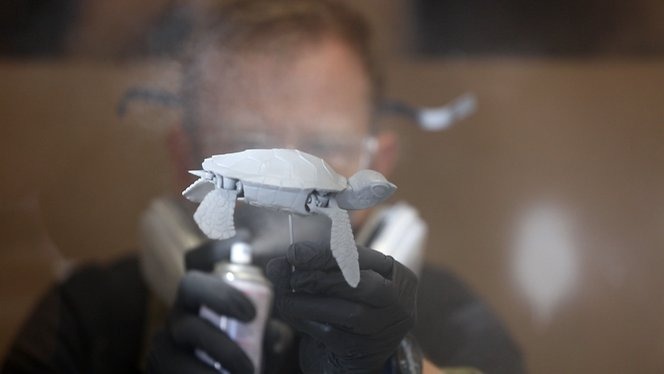
Yes, you can spray paint 3D printed objects to enhance their appearance. Spray painting is a versatile way to add color and finish to your 3D prints. It allows for a smooth, even coat that can transform a plain object into something visually striking. The process involves a few steps, including preparation, painting, and finishing, to ensure the best results. Whether you’re using ABS, PLA, or other materials, choosing the right paint and applying it correctly is key. Let’s dive into the details and see how you can achieve a professional finish on your 3D printed creations.
Getting to Know Your 3D Printing Materials
Why Material Matters in Spray Painting
Understanding the material of your 3D print is essential. Different materials react differently to paint. For instance, ABS is more heat resistant, while PLA is easier to work with but less durable.
ABS – The Tough Guy
• Durability: Strong and impact-resistant.
• Texture: Smooth but may require sanding.
• Flexibility: Moderate, making it less likely to crack.
PLA – The Friendly Choice
• Durability: Less durable than ABS.
• Texture: Smooth, often with visible layer lines.
• Flexibility: Brittle, so handle with care.

PETG – The Middle Ground
• Durability: Stronger than PLA, less than ABS.
• Texture: Glossy, smooth finish.
• Flexibility: More flexible than PLA, less prone to cracking.
Nylon – The Specialist’s Pick
• Durability: Extremely durable and tough.
• Texture: Smooth but can be tricky to paint.
• Flexibility: Highly flexible, ideal for functional parts.
Getting Your 3D Print Ready for Paint
Cleaning: The First Step to Success
Before painting, clean your 3D print. Remove any supports and imperfections. Wash it with mild soap and water, then dry thoroughly.
Sanding: Smoothing Out the Details
• Grit Levels: Start with 100 grit, move to 220, then 400.
• Smooth Finishing: Sand in small circles for an even finish.
Priming: The Secret to Long-Lasting Paint
A good primer ensures the paint sticks well. Choose one that matches your material and spray it evenly.
Mastering the Art of Spray Painting
Choosing Your Paint Wisely
• Types of Paint: Acrylics for versatility, solvent-based for durability.
• Pros and Cons: Acrylics are easy to use, solvent-based lasts longer.
Painting Environment: Setting the Stage
Paint in a well-ventilated area. Avoid windy spots to prevent dust settling on wet paint.
Technique: How to Hold and Move the Spray Can
• Distance: Keep the can 8-12 inches from the object.
• Motion: Use steady, sweeping motions to apply paint.
Layering: Building Up the Perfect Color
• Coats: Apply multiple thin coats, not one thick one.
• Drying Time: Wait 15-30 minutes between coats.

Final Touches: Sealing and Special Effects
Sealing Your Masterpiece
Adding a clear sealant protects your paint. Choose between matte, satin, or glossy finishes.
Adding Flair with Special Effects
• Metallic Finishes: Add sparkle with metallic paints.
• Textured Looks: Use textured sprays for unique designs.
FAQs About Spray Painting 3D Printed Objects
What Kind of Paint Should I Use?
For 3D printed objects, use spray paints designed for plastics. Look for acrylic or solvent-based options. These adhere well and offer various finishes like matte or glossy. Brands often specify if they are suitable for 3D prints. Consider eco-friendly choices if environmental impact matters to you. They minimize harmful VOC emissions. Remember, your paint choice affects the final look. Matte paints offer a subtle, elegant finish, while glossy ones provide a vibrant, reflective look. Always test a small area first to ensure compatibility and desired results.
How Do I Prepare My Object for Painting?
Start by removing any supports and sanding the surface. Use a coarse grit sandpaper and move to finer grits for a smooth finish. Clean the object with soap and water, then dry it completely. Apply a primer suitable for your material. This helps the paint adhere better. Spray in thin, even coats, allowing each to dry before the next. Proper prep ensures a flawless, professional-looking result. It also improves paint longevity, reducing chipping and peeling over time. Spend time on this step for the best possible finish.
Is Water-Based Paint Suitable?
Water-based paints can be used if you prepare the surface well. They’re eco-friendly and have less odor. However, they may not adhere as strongly without a primer. They’re ideal for indoor projects due to low VOC emissions. Ensure compatibility with your 3D material, especially with ABS. Allow extra drying time as they dry slower than solvent-based paints. Their smooth finish makes them popular for artistic applications. Use a primer to enhance adhesion and durability. They work best in well-ventilated areas to speed up the drying process.
Why Sand Before Painting?
Sanding removes layer lines, creating a smooth surface for painting. It ensures better paint adhesion, reducing peeling risks. Start with a coarse grit and progress to finer ones. This process enhances the final look and feel of your painted object. Sanding also helps the primer bond, ensuring a durable finish. It’s a crucial step to achieving a professional appearance. Pay attention to details, as even small imperfections can affect the outcome. Proper sanding enhances the overall aesthetic and long-term durability of the paint.
How to Achieve a Glossy Finish?
First, apply primer and paint your object. Use glossy spray paint for a shiny effect. Finish with a clear glossy sealant for extra shine and protection. Apply in thin layers, allowing each to dry properly. This method enhances the object’s details and vibrancy. Multiple thin coats prevent drips and ensure even coverage. Lightly sand between coats for a smoother finish. This technique creates a polished, professional look. Achieving a glossy finish adds depth and appeal, making your 3D print stand out.
Drying Time Between Coats?
Allow at least 15-30 minutes between coats. This ensures each layer dries properly. Environmental factors like humidity affect drying time. Test the surface; it should be dry to the touch before the next coat. Rushing can cause drips or uneven finishes. Patience results in a more professional look. Adjust time based on conditions for the best outcome. Proper drying prevents imperfections and enhances durability. Follow this guideline for a flawless finish.
Common Mistakes in Spray Painting
Avoid skipping preparation steps like cleaning and sanding. These ensure paint adheres well. Don’t apply too much paint at once; it causes drips. Use multiple thin coats instead. Allow adequate drying time between layers. A well-ventilated area is crucial for safety and quality. These mistakes can affect the final appearance. Proper technique and patience lead to better results. Pay attention to details and follow best practices. This approach ensures a professional, long-lasting finish.
Conclusion
Spray painting 3D printed objects transforms them into finished pieces with vibrant color and texture. With careful preparation, the right materials, and a little patience, anyone can achieve stunning results. By following these guidelines, you can enhance prototypes or create artistic masterpieces. Spray painting opens endless possibilities for customization and creativity.
Data Table: Paint Compatibility with 3D Printing Materials
| Material | Compatible Paint Types | Notes |
|---|---|---|
| PLA | Acrylic, Water-based | Easy to paint, requires sanding for smooth finish |
| ABS | Solvent-based, Acrylic | Requires proper priming, avoid water-based paints |
| PETG | Acrylic, Solvent-based | Good adhesion with primer, smooth surface |
| Nylon | Solvent-based, Specialty paints | Difficult to paint, requires specialty primers |
Jane Ansems is a highly talented and accomplished spray can artist, known for her intricate, detailed, and thought-provoking works of art. She began her career as a street artist in the early 2010s, quickly gaining recognition for her unique and innovative style.