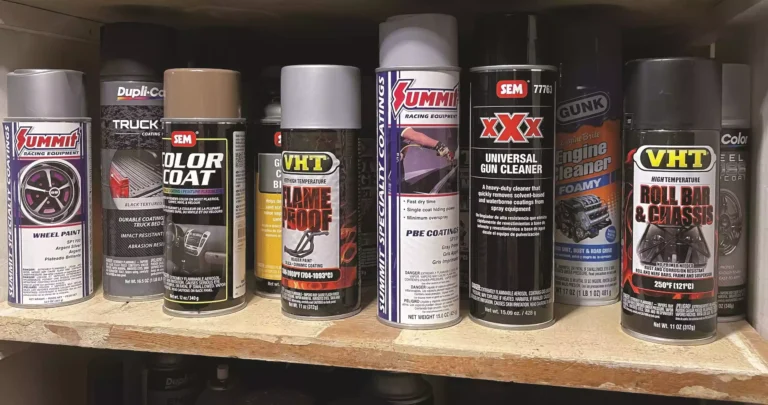
How To Mix Paint For Spray Gun?
I recently had a problem with my spray gun paint mixing being too thick, causing uneven coverage. To solve this, I learned to mix paint for a spray gun, follow the recommended ratio of paint to thinner, stir thoroughly for consistency, and test on a scrap surface before spraying. For detailed steps and tips on achieving the perfect mix, keep reading to enhance your painting skills.
Cleaning the spray gun thoroughly after each use prevents clogs and ensures smooth operation. Sharing these tips can help others achieve better results when mixing paint for a spray gun.
To mix paint for a spray gun effectively, follow these step-by-step instructions:
- Gather Materials:
- Viscosity cup
- Clock
- Liquid for thinning paint
- Stir stick
- Measure Viscosity:
- Use the viscosity cup to measure the flow of paint through a standard hole.
- Time how long it takes for the paint to empty the cup.
- Thinning the Paint:
- Use the recommended liquid to thin the paint based on the desired viscosity.
- Follow the instructions in the user manual for your specific spray gun.
- Mixing Process:
- Stir the paint thoroughly to ensure a consistent mixture.
- Practice mixing to achieve the right viscosity; it may take some trial and error.
- Pouring into the Gun:
- Always use a paint strainer to pour the paint into the gun to catch any impurities.
- Fill the cup 1/2 to 3/4 full to prevent splashing and make handling easier.
- Setting Up:
- Attach the gun to the air supply and set the compressor to the proper PSI.
- Ensure there are no air leaks from the hose or gun.
- Safety Precautions:
- Always wear appropriate safety gear, including a mask and goggles, to protect yourself from paint particles.
- Testing and Adjusting:
- Test the paint flow from the gun on a disposable surface.
- Adjust the viscosity by adding more thinner if needed for better flow.
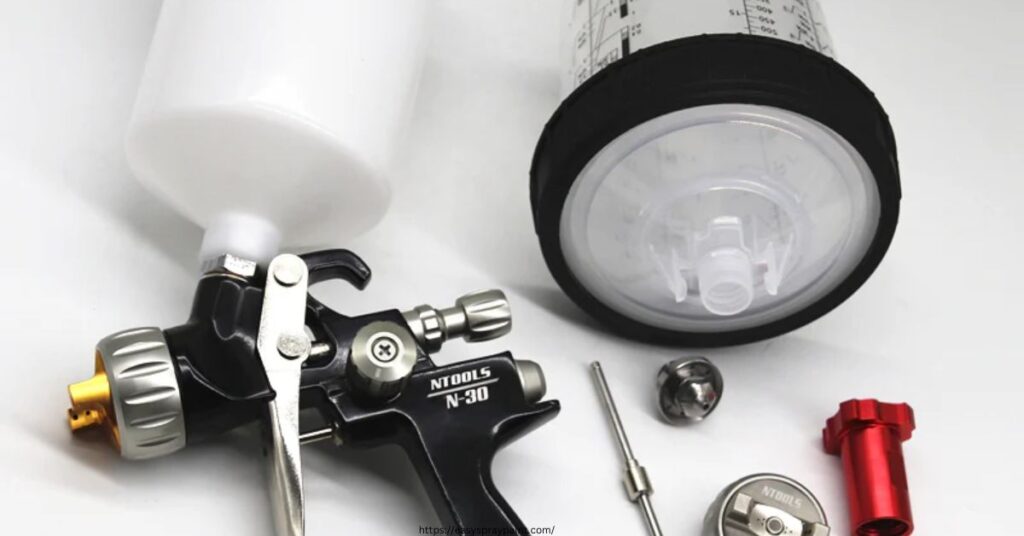
Types of paint suitable for use in a spray gun
When using a spray paint gun, it’s important to choose the right type of spray paint gun & paint for the job. Here are some common types of paint that work well with spray guns:
- Acrylic paint: Water-based and versatile, great for various surfaces.
- Enamel paint: Durable and glossy finish, often used in automotive projects.
- Lacquer paint: Fast-drying with a high-gloss finish, suitable for furniture and woodwork.
- Oil-based paint: Known for durability, ideal for outdoor projects and surfaces that need extra protection. Each type of paint has its own unique qualities, so selecting the right one is key to achieving a successful spray painting project.
How to achieve the right consistency when mixing paint for a spray gun?
To achieve the right consistency when mixing paint for a spray gun, it’s crucial to follow a few key steps. First, start by pouring the paint into a mixing container designed for paint. Then, add the appropriate thinner or reducer gradually while stirring continuously. The consistency you’re aiming for is similar to that of milk not too thick or too thin.
To test the consistency, lift the stirring stick and observe how the paint flows off it; it should form a smooth, even stream. Remember, it’s easier to add more thinner than to correct overly thin paint, so go slow and test frequently until you reach the desired consistency for optimal spray gun performance and a professional finish.
Can additives be used when mixing paint for a spray gun, and if so, which ones are recommended?
When mixing paint for a spray gun, additives can be used to adjust the behavior and ease of use of acrylic paints. These additives can improve flow, slow drying times, and prevent airbrush tip-dry. Some recommended additives include those that enhance flow, reduce drying times, and prevent clogging in the spray gun.
Anti-silicone additives like Multi-Mix Anti-Silicone ‘fisheye’ Additive can be beneficial as they are bodyshop safe and won’t contaminate spraying equipment. It’s important to choose additives that suit the type of paint being used and the desired outcome to achieve optimal results when using a spray gun.
Are there differences in the mixing process for water-based vs. oil-based paints in a spray gun?
| Aspect | Water-Based Paints | Oil-Based Paints |
|---|---|---|
| Toxicity | Water-based paints have lower toxicity due to ultra-low VOC content, making them non-toxic and environmentally friendly. | Oil-based paints contain organic solvents like benzene, toluene, and xylene, making them more toxic and harmful to health. |
| Flammability | Water-based paints are safe and non-flammable as they use water instead of organic solvents. | Oil-based paints are highly flammable due to the presence of solvents like benzene, xylene, and acetone. |
| Odor | Water-based paints do not produce irritating odors during application. | Oil-based paints emit strong odors from organic solvents during painting and drying, which can be irritating to the senses. |
| Drying Time | Water-based paints dry quickly, allowing for immediate occupancy after painting. | Oil-based paints require longer drying times due to the presence of organic solvents that need to evaporate during the drying process. |
| Environmental | Water-based paints are more environmentally friendly with lower VOC emissions. | Oil-based paints release more VOCs into the air, contributing to environmental pollution and potential health risks. |
How do different paint brands affect the mixing process for a spray gun?
When it comes to the mixing process for different paint brands in a spray gun, various factors can influence the outcome. Some paint brands, like Rustoleum, may have specific mixing ratios recommended for spray gun application. For example, Rustoleum paint may require a 2:1 ratio of paint to thinner for HVLP applications and a 1:1 ratio for conventional spray guns.
Different paints may have varying viscosities and drying times, affecting how they should be mixed for optimal performance in a spray gun. It’s crucial to follow the manufacturer’s guidelines and consider the type of spray gun being used to ensure the paint is mixed correctly for a smooth and professional finish.
Can different nozzle sizes on a spray gun affect how paint should be mixed?
The size of the nozzle tip is crucial in determining the quality and efficiency of the paint application process. Here are some key points to consider based on the search results:
- Nozzle Size Selection: Nozzle size selection is essential for achieving optimal results. Thicker coatings require larger orifice sizes, while thinner coatings need smaller tips.
- Project Surface Area: The project surface area influences the fan width produced by the sprayer, affecting coverage and overspray. Larger surfaces benefit from a wider fan width, while smaller areas require a more focused spray.
- Spray Gun Compatibility: Ensure that the spray tip you choose is supported by your spray gun model. Most manufacturers provide information on compatible tip sizes.
- Common Nozzle Sizes and Uses: Different nozzle sizes cater to specific applications. For example, 0.8mm nozzles are suitable for fine mists, while 1.8mm tips are ideal for primers that need quick application.
- Paint Mixing and Application: Properly preparing the surface, using paint specifically made for auto spraying, and ensuring compatibility between different products used in the process are crucial steps to avoid common mistakes when using a car spray gun.
What safety precautions should be taken when mixing paint for a spray gun?
When mixing paint for a spray gun, it is crucial to prioritize safety to protect your health and ensure proper handling of potentially hazardous materials. Here are some essential safety precautions to follow:
- Ventilation: Always work in a well-ventilated area or use appropriate ventilation equipment to prevent inhalation of fumes.
- Protective Gear: Wear protective equipment such as gloves, goggles, and a mask to shield yourself from exposure to harmful chemicals.
- Read Labels: Carefully read and follow the instructions on paint cans and Material Safety Data Sheets (MSDS) for proper handling and disposal.
- Avoid Skin Contact: Prevent skin exposure by wearing appropriate clothing and avoiding direct contact with paint and solvents.
- Fire Safety: Keep flammable materials away from ignition sources, and store paints and solvents in designated fire-resistant areas.
- Clean-Up Procedures: Use designated cleaning solvents for equipment maintenance, ensuring proper disposal of waste materials.
How does the temperature and humidity of the environment impact paint mixing for a spray gun?
The temperature and humidity of the environment play a crucial role in the paint mixing process for a spray gun. Temperature affects the drying time of paint, with high temperatures causing faster drying and low temperatures leading to slower drying times. Humidity, on the other hand, impacts the consistency of the paint and its application. Here’s how temperature and humidity influence paint mixing:
- Temperature: Ideally, the temperature inside a spray booth should range between +19°C and +24°C for optimal painting results. High temperatures can alter the humidity of the air and surfaces, affecting paint application and causing defects like orange peel. Low temperatures can lead to longer drying times and increased energy costs.
- Humidity: Maintaining a relative humidity between 40% and 60% is recommended for spray painting environments. Low humidity levels can accelerate paint drying, leading to uneven application, while high humidity can prolong drying times, potentially causing paint defects like sagging or wrinkling.
How does the type of surface being painted influence the paint mixing process for a spray gun?
The type of surface being painted can significantly influence the paint mixing process for a spray gun. Different surfaces may require adjustments in the paint mixture to ensure proper adhesion, coverage, and finish quality. Here’s how the type of surface impacts paint mixing:
- Porosity: Surfaces with varying levels of porosity, such as wood or concrete, may absorb paint differently. For porous surfaces, a slightly thicker paint mixture may be needed to prevent excessive absorption and ensure even coverage.
- Texture: Smooth surfaces like metal or glass may require a thinner paint mixture to achieve a flawless finish without visible brush marks or uneven application. Adjusting the viscosity of the paint can help achieve a smooth and professional result on smooth surfaces.
- Material Compatibility: Certain surfaces may require specific types of paint or primers for optimal adhesion. Mixing the paint according to manufacturer recommendations for the specific surface material is essential to ensure durability and longevity of the finish.
Common mistakes to avoid when mixing paint for a spray gun
When mixing paint for a spray gun, it’s essential to steer clear of common mistakes that can lead to subpar results. Here are some key errors to avoid:
- Mixing Directly in the Spray Gun Cup: Mixing paint directly in the spray gun cup can result in poorly mixed, thick paint settling at the bottom, causing application issues.
- Using Incompatible Paint Brands or Types: Mixing paint brands or types that don’t chemically bond can lead to flaws like fish eyes, cracking, and wrinkling, affecting the finish quality.
- Improper Surface Preparation: Failing to properly prepare the surface before painting can lead to adhesion issues. Thoroughly clean and sand the surface to remove contaminants for better paint adhesion.
- Incorrect Thinning of Oil-Based Paints: Not thinning oil-based paints appropriately before spraying can clog the spray nozzle. Thinning oil-based enamels by 10 to 30 percent with the correct solvent is crucial for smooth application.
- Neglecting Proper Spray Gun Technique: Poor spray gun adjustment and handling can result in defects like splattering, dry spray, runs, and orange peel. Calibrating the gun settings correctly and maintaining the right distance from the surface is essential for a flawless finish.
How long can mixed paint be stored before it needs to be used in a spray gun?
When it comes to storing mixed paint for a spray gun, the duration before it needs to be used can vary based on different factors. Generally, the pot life of most paints used in spray guns is around 3 hours. After this time, the paint may start to thicken or dry, affecting its application quality. It’s crucial to consider the temperature and humidity of the storage environment, as higher temperatures can accelerate the drying process of the paint mixture.
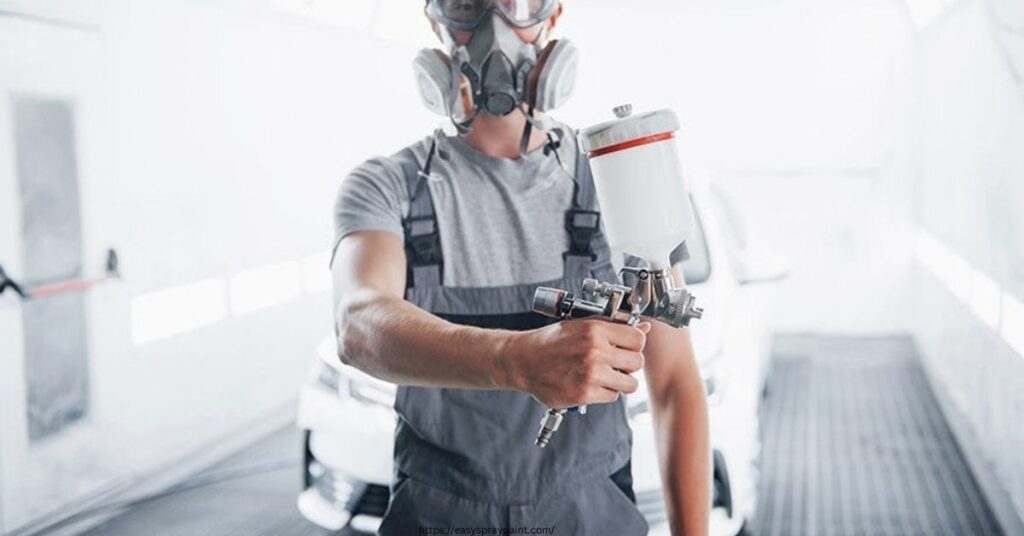
To ensure optimal performance and avoid wastage, it’s recommended to mix only the amount of paint needed for immediate use. If storing mixed paint is necessary, seal the container tightly to prevent air exposure and store it in a cool, dry place to extend its usability. Always refer to the specific instructions provided by the paint manufacturer for the best practices regarding storing mixed paint for a spray gun.
Ideal cleaning process for a spray gun after painting to maintain its longevity
To maintain the longevity of a spray gun after painting, it is crucial to follow an ideal cleaning process. Here are the steps recommended for cleaning a spray gun effectively:
- Immediate Cleaning: The spray gun should be cleaned immediately after each use to prevent paint from drying and causing blockages.
- Disassembly: Remove the gun from the air supply, empty any remaining paint from the cup, and fully trigger the gun to drain any remaining paint from fluid passages.
- Cleaning Process:
- For guns with metal gravity cups:
- Squirt cleaner into the cup, slosh it around, and fully trigger the gun to expel the dirty cleaner.
- Remove the cup, clean the barrel filter if used, and reinstall it.
- Clean the air cap by squirting cleaner or immersing it in cleaner and brushing away paint residue using a non-metallic brush.
- Flush out fluid passageways with a fast-drying solvent like acetone to displace any water.
- For guns with disposable gravity cups:
- Remove the cup, invert the gun and cup, and fully trigger the gun to drain paint back into the cup.
- Clean all parts with waste thinner as you remove them.
- For guns with metal gravity cups:
- Thorough Cleaning:
- Wipe down all parts until dry and repeat cleaning steps if necessary.
- Remove all parts for a more thorough cleaning, including the air cap, fluid nozzle, needle, and other components.
- Soak parts in a cleaning solution, use brushes to clean them thoroughly, and ensure they are completely dry before reassembly.
- Reassembly: After cleaning all parts, reassemble the spray gun while lubricating moving parts and threads to prevent sticking or seizing.
- Final Steps: Ensure all waste materials are disposed of properly, clean workstations and tools, and store the spray gun in a clean and dry environment for future use/
How to mix Rustoleum paint for a spray gun?
When mixing Rustoleum paint for a spray gun, it’s essential to follow the recommended mixing ratios for optimal results. Here are the steps to mix Rustoleum paint:
- Latex-Based Paint (HVLP): Mix at a ratio of 2 parts paint to 1 part thinner.
- Latex-Based Paint (Conventional): Mix at a ratio of 1 part paint to 1 part thinner.
- Oil-Based Paint: Mix at a ratio of 8 parts paint, 4 parts slow, medium, or fast automotive thinner.
How to mix enamel paint for a spray gun?
When mixing enamel paint for a spray gun, follow these steps:
- Mixing Ratio: Enamel paint is typically mixed at a ratio of 8 parts paint, 4 parts thinner, and 1 part hardener.
- Thinning: Use slow, medium, or fast automotive thinners based on the desired application and drying time
How to mix oil-based paint for a spray gun?
To mix oil-based paint for a spray gun effectively, follow these guidelines:
- Mixing Ratio: Oil-based paints like Rustoleum can be mixed at a ratio of 4 parts color to 3 parts acetone.
- Thinning: Thin the paint with acetone to achieve the desired viscosity for spraying.
FAQs
How do I achieve the right consistency when mixing paint for a spray gun?
Ensure a smooth mix by gradually adding thinner until the desired viscosity is reached. Test on a surface to confirm the spray gun’s proper functionality.
Can different nozzle sizes on a spray gun affect how paint should be mixed?
Yes, adjust your paint mixture to suit the nozzle size. Larger nozzles may require a thicker consistency, while smaller ones need a finer mix.
What safety precautions should be taken when mixing paint for a spray gun?
Wear protective gear like gloves and a mask. Work in a well-ventilated area to minimize exposure to fumes.
How does the temperature and humidity impact paint mixing for a spray gun?
Higher temperatures may require a slightly thicker mix, while humid conditions may necessitate faster application to prevent drying issues.
How to mix Rustoleum paint for a spray gun?
Follow the manufacturer’s instructions on the can. Usually, thinning with the recommended solvent achieves the right consistency.
Conclusion For ‘How To Mix Paint For Spray Gun’
Mastering the art of paint mixing for a spray gun enhances your painting endeavors. With the right consistency, safety precautions, and understanding of your equipment, you’re on your way to achieving professional and satisfying results. Keep experimenting and refining your skills for a seamless spray gun painting experience. Happy painting!
Jane Ansems is a highly talented and accomplished spray can artist, known for her intricate, detailed, and thought-provoking works of art. She began her career as a street artist in the early 2010s, quickly gaining recognition for her unique and innovative style.

