Common Mistakes To Avoid When Using Enamel And Latex Spray Paints!
Spray painting is a popular choice for DIY enthusiasts and home improvement projects because it can be done quickly and easily, and can create a professional-looking finish.
Enamel and latex spray paints are particularly popular choices due to their durability, versatility, and easy availability.
However, as with any painting technique, there are common mistakes that can be made which can negatively impact the final result.
In this article, we will explore the most common mistakes people make when using enamel and latex spray paints and provide detailed solutions and step-by-step processes to follow for each.
The target audience for this article is both DIY enthusiasts and professional painters who want to learn how to use enamel and latex spray paints correctly. Whether you are painting furniture, walls, or metal surfaces, this article will provide you with the information you need to achieve a professional-looking finish.
Types of Surfaces
We will be discussing a wide range of surfaces in this article, including wood, metal, plastic, and masonry. These surfaces can be found in various areas of a home or property, such as furniture, walls, doors, window frames, and even outdoor fixtures. We will also be focusing on the most common types of enamel and latex spray paints available in the market.
Common Mistakes To Avoid When Using Enamel And Latex Spray Paints
| Common Mistake | Solution/Best Practice | Source |
|---|---|---|
| Choosing the wrong paint for the job | Read the label carefully to ensure the paint is suitable for the surface and intended use. Test the paint on a small area first. | This Old House |
| Failing to prepare the surface properly | Clean the surface thoroughly and remove any dirt, grease, or loose paint. Sand the surface to create a rough texture for better adhesion. Use a primer if necessary. | Bob Vila |
| Applying too much or too little paint | Apply thin and even coats of paint, overlapping each pass slightly. Avoid spraying too close or too far from the surface. | The Spruce |
| Not allowing enough time for the paint to dry | Follow the manufacturer’s recommended drying/curing time. Avoid touching or using the painted object until it’s fully cured. | DIY Network |
| Not using proper ventilation or protective gear | Use spray paints in a well-ventilated area, preferably outdoors. Wear a respirator mask, gloves, and eye protection. | The Family Handyman |
Choosing the Wrong Paint for the Job
One of the most common mistakes people make when using enamel and latex spray paints is choosing the wrong paint for the job. It’s important to consider the type of surface you are painting, as well as the conditions it will be exposed to.
For example, if you are painting a metal surface that will be exposed to harsh weather conditions, you will need a paint that is specifically designed for metal and can withstand the elements.
Real-Life Example:
Sarah wants to paint her front door with spray paint. She buys a can of spray paint labeled “multi-surface,” assuming it will work on her wooden door. However, after applying the paint, she notices that it does not adhere well to the wood and chips easily.
Solution:
To avoid this mistake, make sure to read the label on the paint can carefully and choose a paint that is designed for the surface you will be painting.

Failing to Prepare the Surface Properly
Another common mistake when using enamel and latex spray paints is failing to prepare the surface properly. A clean and smooth surface is crucial for achieving a professional-looking finish. If the surface is dirty or has imperfections, the paint will not adhere well and may peel or chip.
Real-Life Example:
Tom wants to paint his old metal toolbox with spray paint. He skips the step of cleaning the toolbox, thinking that the paint will cover any imperfections. However, after painting the toolbox, he notices that the paint is peeling off in some areas.
Solution:
To avoid this mistake, make sure to clean the surface thoroughly and remove any dirt, grease, or rust. Sand the surface if necessary to create a smooth surface for the paint to adhere to.
Applying Too Much or Too Little Paint
Another mistake that can affect the final result is applying too much or too little paint. Applying too much paint can cause drips and runs while applying too little paint can result in an uneven finish.
Real-Life Example:
Emily wants to paint her wooden dresser with spray paint. She applies several coats of paint, thinking that the more coats she applies, the better the finish will look. However, after the paint dries, she notices that the dresser has a rough texture due to the excess paint.
Solution:
To avoid this mistake, follow the instructions on the paint can and apply thin, even coats of paint. Allow each coat to dry completely before applying another.
Not Allowing Enough Time for the Paint to Dry
Another mistake people make when using enamel and latex spray paints is not allowing enough time for the paint to dry. If the paint is not completely dry before applying another coat, it can result in a rough or uneven finish.
Real-Life Example:
John wants to paint his metal garden chairs with spray paint. He applies the second coat of paint before the first coat is completely dry, resulting in a rough finish.
Solution:
To avoid this mistake, make sure to follow the instructions on the paint can and allow each coat of paint to dry completely before applying another. The drying time can vary depending on the type of paint and the conditions in which it’s applied. It’s important to be patient and allow the paint to dry completely before moving on to the next coat or using the painted surface.
Related: How Long Does Spray Paint Take To Dry?
Not Using Proper Ventilation or Protective Gear
One of the most important things to consider when using enamel and latex spray paints is proper ventilation and protective gear. These paints contain chemicals that can be harmful if inhaled or absorbed through the skin. It’s important to use these paints in a well-ventilated area and wear protective gear, such as a respirator, gloves, and eye protection.
Real-Life Example:
Mark wants to paint his metal patio furniture with spray paint. He works in a small, enclosed area without proper ventilation and without wearing any protective gear. He starts feeling dizzy and nauseous after a few minutes of painting.
Solution:
To avoid this mistake, make sure to work in a well-ventilated area, such as outdoors or in a well-ventilated garage. Wear protective gear to protect yourself from harmful chemicals.

Related: How To Spray Paint Without Streaks?
Step-by-Step Process for Using Enamel and Latex Spray Paints Effectively
Now that we’ve discussed common mistakes to avoid, let’s go through a step-by-step process for using enamel and latex spray paints effectively.
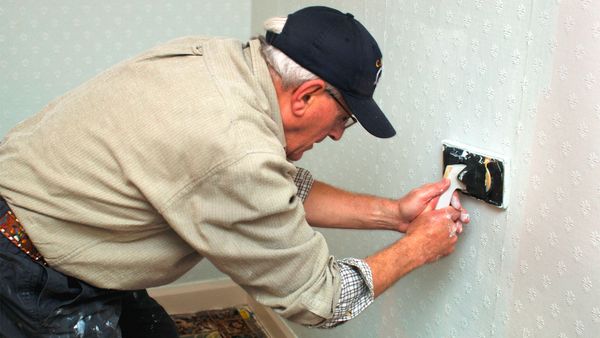
Step 1: Choose the Right Paint for the Job
As we discussed earlier, choosing the right paint for the job is crucial for achieving a professional-looking finish. Make sure to read the label on the paint can carefully and choose a paint that is designed for the surface you will be painting.
Step 2: Prepare the Surface
Preparing the surface is essential for achieving a smooth and even finish. Clean the surface thoroughly and remove any dirt, grease, or rust. Sand the surface if necessary to create a smooth surface for the paint to adhere to.
Step 3: Protect the Surrounding Area
Spray painting can create a lot of overspray, so it’s important to protect the surrounding area. Use drop cloths or newspaper to cover any nearby surfaces and tape off any areas that you don’t want to paint.
Step 4: Shake the Paint Can
Before using the paint, make sure to shake the can well. This will help mix the paint and ensure a smooth, even application.
Step 5: Test the Spray Pattern
Before painting the surface, test the spray pattern on a piece of cardboard or scrap material. This will help you get a feel for the paint and ensure that it’s coming out in a smooth, even pattern.
Step 6: Apply Thin, Even Coats
When painting the surface, apply thin, even coats of paint. Hold the can about 6-8 inches away from the surface and use a sweeping motion to apply the paint. Allow each coat to dry completely before applying another.
Step 7: Allow the Paint to Dry Completely
After applying the final coat of paint, allow it to dry completely before using the painted surface. The drying time can vary depending on the type of paint and the conditions in which it’s applied. Be patient and allow the paint to dry completely before using the painted surface.
Some Other Misconceptions & Need To Avoid Also
Over-spraying
One of the most common mistakes when using enamel and latex spray paints is over-spraying. Over-spraying occurs when too much paint is sprayed on the surface, resulting in a thick, uneven layer that can lead to drips, runs, and an unappealing finish. Over-spraying can also waste paint and prolong the drying time.
The solution to over-spraying is to apply several thin coats of paint, rather than one thick coat. Begin by holding the spray can approximately 6-8 inches away from the surface and spray in a sweeping motion, moving the can from side to side.
Overlapping each stroke by 50% ensures even coverage without overloading the surface. Allow each coat to dry completely before applying another. Applying thin coats also allows for better control and precision in achieving the desired finish.
Under-spraying
Under-spraying is another common mistake, where not enough paint is applied to the surface. This can result in a patchy or streaky finish that may require multiple coats, leading to longer drying times.
The solution to under-spraying is to ensure that the can is shaken thoroughly for at least 1-2 minutes before use, and periodically during use to ensure the paint is mixed properly.
Hold the can approximately 6-8 inches away from the surface, and apply the paint in a light, even coat, moving the can from side to side. For better coverage, apply a second or third coat after the first has dried completely.

Using the Wrong Type of Paint
Using the wrong type of enamel or latex spray paint for the surface can lead to poor adhesion, flaking, and peeling. For example, using latex paint on a metal surface can cause it to rust, while using enamel paint on a plastic surface can result in cracking and chipping.
To avoid this mistake, read the manufacturer’s instructions carefully before purchasing the paint. Look for a paint specifically formulated for the type of surface you want to paint.
For example, enamel spray paints are best suited for metal and masonry surfaces, while latex spray paints are ideal for wood and plastic surfaces. Be sure to choose a paint that is also appropriate for the intended use of the item or surface, such as interior or exterior.
Not Allowing Enough Time for Paint to Dry
Not allowing enough time for the paint to dry before applying additional coats or handling the surface can result in smudging, and smearing, and can ruin the finish of the paint. This mistake can be particularly frustrating because it can undo all of the hard work and effort put into the project.
The solution to this mistake is to carefully read the manufacturer’s instructions and follow the recommended drying times. It’s essential to allow each coat to dry completely before applying additional coats or handling the surface.
The drying time can vary depending on the type of paint, surface, and environmental conditions, such as humidity and temperature. It’s always better to err on the side of caution and wait longer than recommended, as this will ensure a better finish and avoid any potential problems.
Proper Preparation
One of the most critical steps in achieving a successful spray painting project is proper preparation. Neglecting to clean and prime the surface can result in poor adhesion and a subpar finish.
To prepare the surface, start by cleaning it thoroughly, removing any dirt, grease, or debris. A gentle scrub with warm soapy water, followed by rinsing and drying the surface, should suffice. For metal surfaces, use a metal primer to help the paint adhere better and prevent rusting.
For wood surfaces, use a wood primer to seal the wood and provide a smooth surface for the paint to adhere to. For plastic surfaces, use a plastic primer specifically designed for spray painting. Allow the primer to dry completely before applying the spray paint.
Post-Painting Cleanup and Maintenance
After completing the spray painting project, it’s essential to clean up properly and maintain the surface to ensure its longevity and durability. Neglecting to do so can result in the paint chipping, peeling, or fading.
To clean the spray-painted surface, use a gentle cleaner, such as mild soap and water, and a soft cloth or sponge. Avoid using abrasive cleaners or rough scrubbers that can scratch the surface.
For outdoor surfaces, such as furniture or fixtures, it’s important to protect them from the elements by using a protective coating, such as a clear sealant or varnish. Regular maintenance, such as checking for chips or scratches and touching them up promptly, can also help prolong the life of the paint.
Equipment and Brands
Choosing the right equipment and brand for spray painting is also crucial for achieving a successful outcome. There are many different brands and types of spray paint available, and it can be overwhelming to choose the right one.
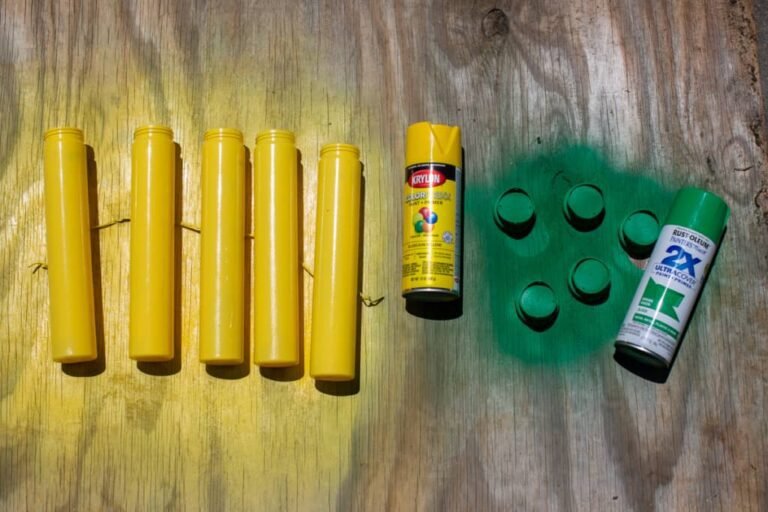
When starting with spray paint, it’s best to choose a reputable brand that is known for its quality and durability. Brands such as Rust-Oleum, Krylon, and Montana are popular choices for their wide range of colors, finishes, and suitability for various surfaces.
It’s also important to use the right equipment, such as a respirator mask, gloves, and eye protection, to ensure safety and protect against harmful fumes and chemicals.
FAQs
Here are some FAQs related to enamel and latex spray paints that readers might find helpful:
Can I use enamel spray paint on a surface that has already been painted with latex paint?
Answer: Yes, you can use enamel spray paint on a surface that has been painted with latex paint. However, it’s important to properly prepare the surface before applying the enamel paint to ensure adhesion.
Can I use latex spray paint on a metal surface?
Answer: Yes, you can use latex spray paint on a metal surface. However, you may need to use a metal primer first to ensure adhesion and prevent rust.
How long does it take for enamel spray paint to dry?
Answer: Enamel spray paint typically dries to the touch within 30 minutes to an hour, but it can take up to 24 hours to fully cure. It’s important to allow the paint to fully cure before using or handling the painted object.
Can I use enamel spray paint indoors?
Answer: Enamel spray paint can be used indoors, but it’s important to ensure proper ventilation and use a respirator mask to avoid inhaling fumes.
How can I prevent overspray when using spray paints?
Answer: To prevent overspray, it’s important to mask off surrounding areas with painter’s tape and plastic sheeting. You can also use a cardboard box or large cardboard sheet as a spray booth to contain the overspray. Additionally, using a spray paint gun with adjustable spray patterns can help control overspray.
Conclusion:
In conclusion, using enamel and latex spray paints can be a great way to achieve a smooth and professional-looking finish on a variety of surfaces. However, there are common mistakes that people make when using these paints that can lead to disappointing results.
By following the solutions and best practices outlined in this article, you can avoid these mistakes and create a beautiful and long-lasting finish on your projects.
Here are some key takeaways from this article:
- Read the label carefully and choose the right type of spray paint for your project.
- Properly prepare the surface before painting by cleaning it and sanding it if necessary.
- Apply thin and even coats of paint, holding the can at the correct distance from the surface.
- Allow enough time for the paint to dry and cure before using the painted object.
- Use spray paints in a well-ventilated area and wear proper protective gear.
With these guidelines in mind, you can confidently tackle your next spray painting project and achieve professional-looking results. Remember, practice makes perfect, so don’t be afraid to experiment and try new techniques. By learning from your mistakes and building on your successes, you can become a skilled and successful spray painter.
Jane Ansems is a highly talented and accomplished spray can artist, known for her intricate, detailed, and thought-provoking works of art. She began her career as a street artist in the early 2010s, quickly gaining recognition for her unique and innovative style.


