How To Clean And Maintain Your Spray Paint Cans? 4 Easy Steps Increase Lifespan
As a painter, you know how important spray paint cans are for your work. They come in handy when you need to quickly spray a surface, and they also give you more control over the amount of paint you use.
But did you know that you also need to maintain your spray paint cans to ensure they work properly? In this article, we will teach you how to clean and maintain your spray paint cans to ensure they last longer and work better.
Why Cleaning and Maintaining Your Spray Paint Cans is Important
Cleaning and maintaining your spray paint cans is essential because it ensures they work properly and last longer. Over time, debris and dust can build up inside the nozzle, which can clog it and cause the paint to spray unevenly. This can ruin your work and make it difficult to achieve the desired effect.
Additionally, if you don’t store your spray paint cans properly, they can become damaged, and the paint can become thicker, making it harder to use.
Materials You Will Need
Before you begin cleaning and maintaining your spray paint cans, you will need a few materials:
- Soap or dish detergent.
- Warm water.
- A clean cloth.
- A small container.
- A can of compressed air.
- A spray can trigger (optional).
How To Clean And Maintain Your Spray Paint Cans?
Cleaning your spray paint can is essential to ensure that it works properly. Here are the steps you need to follow to clean your spray paint can:
Step 1: Remove the Nozzle
The first step is to remove the nozzle from the can. You can do this by twisting it counterclockwise. If the nozzle is clogged, you may need to use a pair of pliers to remove it.
Step 2: Soak the Nozzle and Cap
After you have removed the nozzle, place it and the cap in a small container filled with warm water and soap. Allow it to soak for 10-15 minutes.
Step 3: Clean the Can
While the nozzle and cap are soaking, you can clean the can. Take a clean cloth and wipe down the outside of the can. If there is any debris or paint on the outside, you can use warm water and soap to clean it off.
Step 4: Reassemble the Can
Once you have cleaned the nozzle, cap, and can, you can reassemble the spray paint can. Simply twist the nozzle back onto the can in a clockwise direction.
How to Maintain Your Spray Paint Can?
Maintaining your spray paint can is just as important as cleaning it. Here are some steps you can take to maintain your spray paint can:
Step 1: Store the Can Properly
When you’re not using your spray paint can make sure you store it in a cool, dry place. Avoid leaving it in direct sunlight or in areas with high humidity.
Step 2: Shake the Can Before Use
Before using your spray paint can shake it well for at least 1-2 minutes. This will ensure that the paint is well-mixed and that it sprays evenly. If the paint is not mixed well, it can cause the nozzle to clog, and the paint may not come out evenly.
Step 3: Clear the Nozzle After Use
After using your spray paint can, it’s important to clear the nozzle to prevent it from clogging. To do this, hold the can upside down and spray it for a few seconds. This will clear any excess paint from the nozzle and prevent it from drying and clogging.
Step 4: Use a Spray Can to Trigger
Using a spray can trigger can make it easier to control the amount of paint you spray, and it can also help prevent hand fatigue. The trigger attaches to the top of the can and allows you to spray the paint with a more natural motion.
More About: Ultimate Guide To Choosing Spray Can
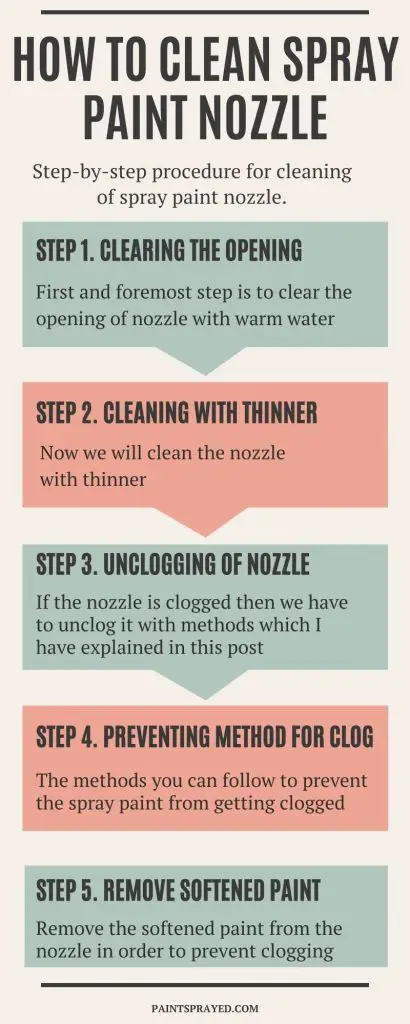
How to Clean Spray Paint Nozzles?
Spray paint nozzles can become clogged or dirty over time, which can make it difficult to achieve a smooth and even spray pattern. Fortunately, cleaning spray paint nozzles is a simple and easy process that can help extend the life of your spray paint cans and ensure that they work properly.
Why Clean Spray Paint Nozzles?
There are several reasons why you should clean your spray paint nozzles on a regular basis. First, debris and paint buildup inside the nozzle can cause it to become clogged or damaged, which can affect the spray pattern and make it difficult to achieve the desired finish.
Additionally, a dirty nozzle can cause the paint to spray unevenly or sputter, which can result in an unattractive or inconsistent finish.
Tools You Will Need
To clean your spray paint nozzles, you will need a few simple tools:
- Warm water.
- Mild soap or detergent.
- A small brush or toothbrush.
- A clean cloth or paper towel.
Steps to Clean Spray Paint Nozzles
Here are the steps to follow to clean your spray paint nozzles:
Step 1: Remove the Nozzle
The first step is to remove the nozzle from the can. This can usually be done by twisting it counterclockwise. If the nozzle is stuck or difficult to remove, you can try using pliers or a wrench to grip it and twist it off.
Step 2: Soak the Nozzle in Warm, Soapy Water
Once the nozzle is removed, place it in a small container filled with warm water and a few drops of mild soap or detergent. Let the nozzle soak for several minutes to help loosen any debris or paint buildup inside.
Step 3: Clean the Nozzle with a Brush
After the nozzle has soaked for a few minutes, use a small brush or toothbrush to gently scrub the inside and outside of the nozzle. Be sure to remove any paint or debris that may be stuck inside, and rinse the nozzle thoroughly with warm water.
Step 4: Dry and Reattach the Nozzle
Once the nozzle is clean, use a clean cloth or paper towel to dry it thoroughly. Then, reattach the nozzle to the can by twisting it clockwise until it is snug. You can test the nozzle by spraying a small amount of paint onto a scrap piece of paper to make sure it is working properly.
How to keep the spray paint nozzle from clogging?
To prevent the spray paint nozzle from clogging, clean it before and after use, shake the can well, hold the can upside down and spray for a few seconds after each use, and store the can properly.
Spray paint nozzles can clog due to various reasons, such as using low-quality paint or not cleaning the nozzle properly. Clogged nozzles can lead to uneven spray patterns and ruin your painting project. Here are some tips on how to keep your spray paint nozzle from clogging:
- Use high-quality spray paint: Using high-quality spray paint can prevent clogs and ensure that your paint flows smoothly through the nozzle.
- Shake the can thoroughly: Before use, shake the can thoroughly to ensure that the paint is well mixed and the nozzle is clear.
- Clear the nozzle: If you notice the nozzle is clogged, remove the nozzle and soak it in warm water or mineral spirits. You can also use a needle or toothpick to clear any paint buildup in the nozzle.
- Clean the nozzle after use: After each use, wipe the nozzle with a clean cloth and spray some solvent or paint thinner through it. This will prevent any leftover paint from drying and clogging the nozzle.
- Store the can upside down: Storing the can upside down can prevent the paint from settling in the nozzle and clogging it.
By following these tips, you can keep your spray paint nozzle from clogging and ensure that your painting projects are successful.
FAQs
Can I reuse the nozzle after cleaning it?
Yes, you can reuse the nozzle after cleaning it. Just make sure it is completely dry before reattaching it to the can.
How often should I clean my spray paint can?
You should clean your spray paint can after every use to prevent debris from building up inside the nozzle.
Can I use any type of soap to clean my spray paint can?
Yes, you can use any type of soap to clean your spray paint can. Just make sure to rinse it thoroughly with warm water afterward.
Can I store my spray paint can in the refrigerator?
No, you should not store your spray paint can in the refrigerator. This can cause the paint to thicken and become unusable.
Do I need to wear protective gear when cleaning my spray paint can?
It’s always a good idea to wear gloves and eye protection when handling spray paint cans, especially when cleaning them. This will prevent any paint or debris from getting on your skin or in your eyes.
How should spray paint cans be stored?
Spray paint cans should be stored in a cool, dry, and well-ventilated area away from direct sunlight, heat sources, and flames. They should be stored upright and away from any potential sources of damage, such as sharp objects or heavy items.
How do you keep spray paint caps clean?
To keep spray paint caps clean, remove them from the can after each use and soak them in a cleaning solution such as acetone or paint thinner.
Use a brush or toothbrush to scrub away any remaining paint, and rinse the caps with water before storing them in a dry, well-ventilated area.
Conclusion
Cleaning and maintaining your spray paint cans is essential to ensure they work properly and last longer. By following these simple steps, you can keep your spray paint cans in good condition and prevent them from becoming clogged or damaged. Remember to store your cans properly, shake them well before use, and clear the nozzle after use.
Jane Ansems is a highly talented and accomplished spray can artist, known for her intricate, detailed, and thought-provoking works of art. She began her career as a street artist in the early 2010s, quickly gaining recognition for her unique and innovative style.


